LiftMaster LA-400 and 412 Support
Batteries
Batteries are one of the easiest things to check and replace yourself
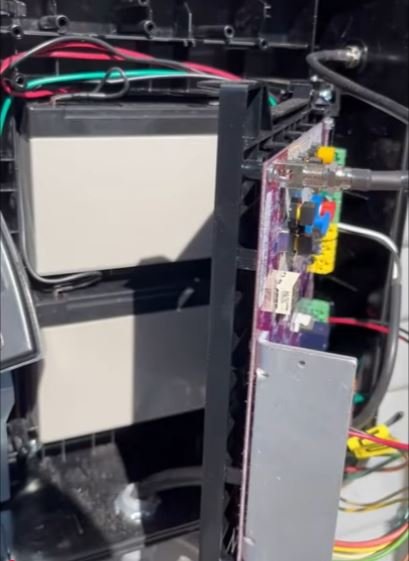
If it has been a long time since your gate has needed service, chances are it's just batteries. They are located inside the control box behind the control board. The control board hinges on the right-hand side. After loosening 4 screws in each corner of the plastic tray, slide the tray to the left and then swing towards you to expose the batteries as shown in the picture. If they are over 3 years old it's good to go ahead and replace them. They are (2) 12Volt 7ah batteries available in several retail locations, local battery stores, and even Amazon.
Solar Panel
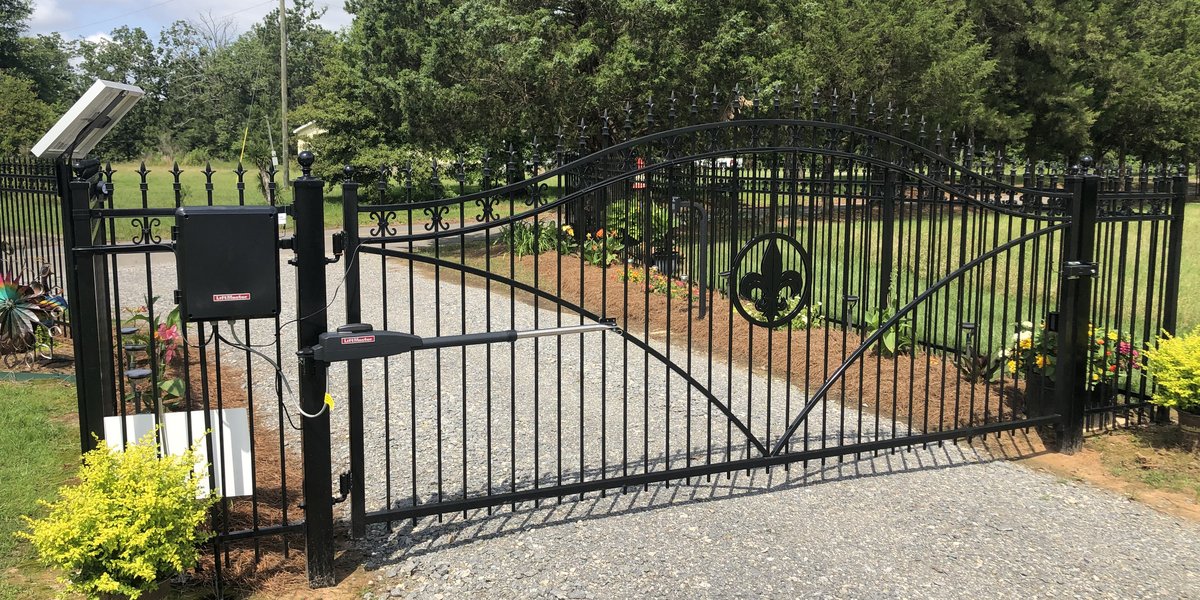
Make sure your solar panel is pointed directly due North and has full sun atleast 4-6 hours a day. In Spring, trim back into plants that grow over your solar panel. Blocking the panel by just a small amount can greatly affect it's charging potential. When we service a gate system, we always trim back nearby plants that risk growing over solar panels.
Photo-Eye Alignment
Check for anything blocking your Photo-Eye, such as newly installed decorations or plants
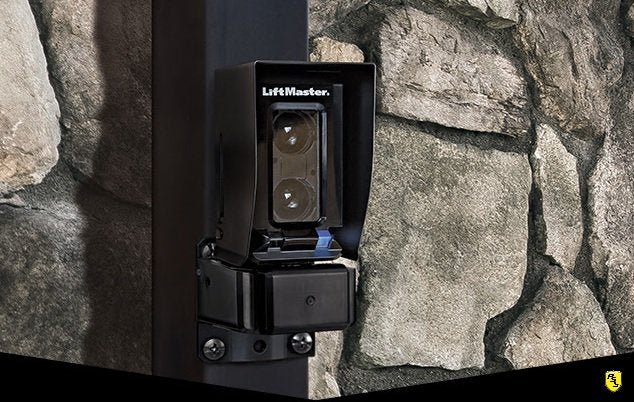
Look for this Photo-Eye installed near the hinged side of your gate. Then on the opposite side of the driveway you should see a small rectangular reflector. Wipe both of these items with a rag and check they are not broken.
While standing outside the path of the gate, try to activate the gate with your remote control. If it does not move, inspect your photo eye's illuminated lights; it should be blue. A red illuminated light means the photo-eye cannot see it's reflector by either blockage or misalignment. You can attempted to correct the misalignment, but will need a few allen wrenches (sometimes common practice to leave inside the control box).